Enrolment system for students
8. Timetable
You can create your own timetable around your lectures.
There are two variations: a timetable with pre-selected courses and a timetable with courses you have enrolled on.
8.1 Timetable with pre-selected courses
Here you can select courses you are interested in by ticking the box pre-select beneath the course and clicking on the button Schedule pre-selected:

Under My functions - Schedules on the left of the navigation bar you can have your timetable shown to you:
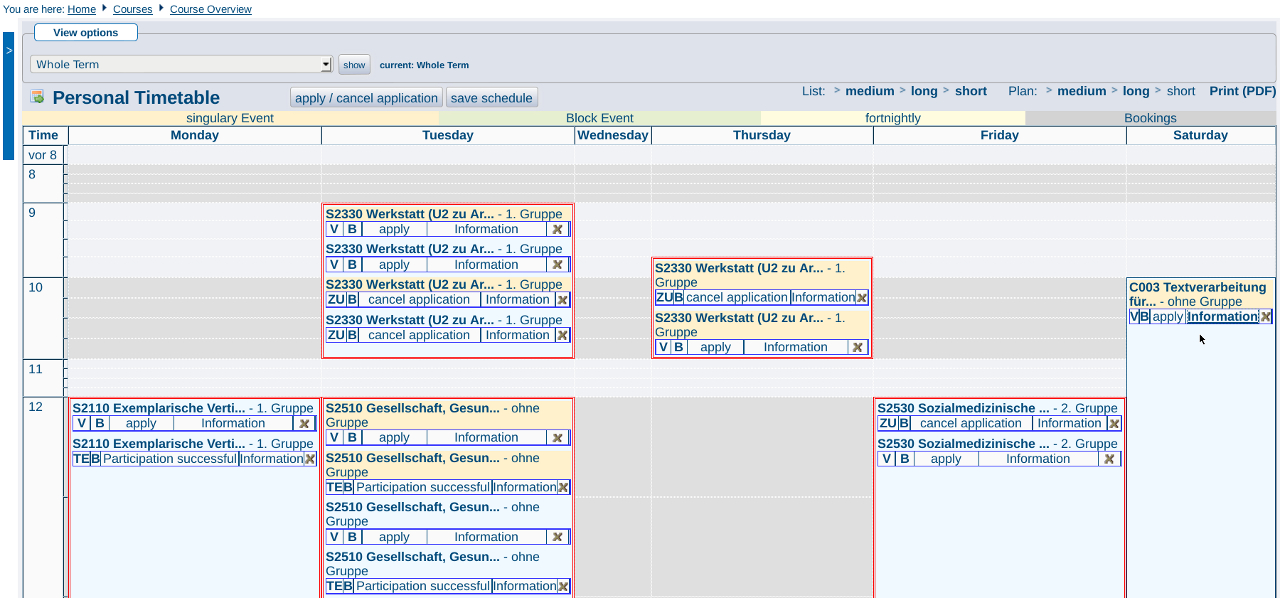
Pre-selected courses are marked with V (Vorgemerkt).
You can now organize your timetable in whatever way suits you best. You can remove any overlapping of courses, see where you have free time and search in the lecture schedule for further relevant courses. In order to save your updated timetable, you simply click on the button save schedule.
Please note: Pre-selecting courses is not binding and does not mean that you have enrolled officially on the course!
You can also take previous enrollment on courses out of your timetable. Please see next illustration.
8.2 Timetable with courses you have enrolled on
If you click on the button apply/cancel application in the middle of the header for timetables, you will again be shown a list of all the entries you have saved. You can then decide in one go whether you wish to enrol on these courses or not. This function is only active during the enrolment period. Please see illustration below.
You can enrol on individual courses by clicking on apply in the timetable for pre-scheduled courses. Please see illustration below.
Once you have enrolled on any or all of your desired courses, you can save these changes through save schedule. You can recognise which updates to your course enrolments have been successful by the designation ZU (zugelassen, that means accepted) in the column. This differs from the V symbol which defines courses as merely pre-selected: